A UI Policy is one of the easiest to build and understand artifacts in the ServiceNow universe. At its most basic level, it takes no condition and does up to three actions: makes a field shown or hidden, editable or read-only, and/or mandatory or optional. That’s it!
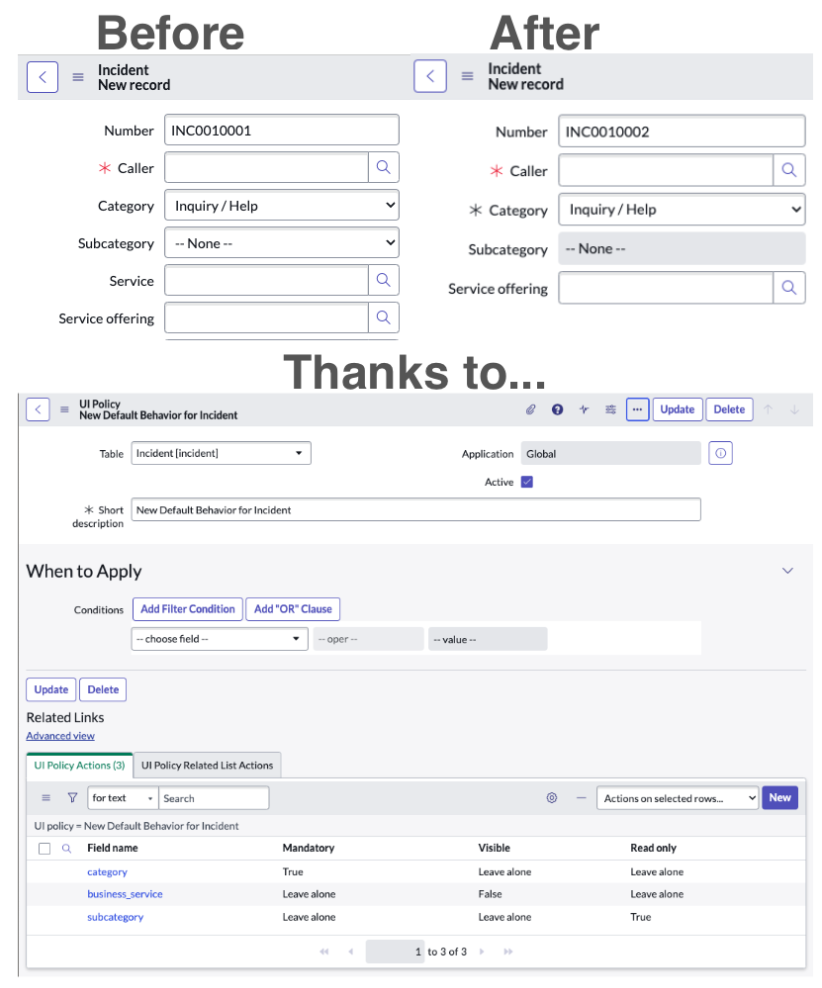
This is obviously an over-simplified scenario. Let’s take this more realistic scenario:
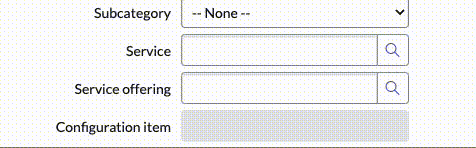
A field “Configuration item” must be editable and mandatory when the field “Service” has a value. When the field “Service” does not have a value, the field “Configuration item” must be empty and read-only.
This seems simple enough… just create a UI Policy with this as the condition: Service > is not empty. The UI Policy Action needed for this would be against the ‘Configuration item’ field and have ‘Mandatory’ set to “true” and ‘Read only’ set to “false”.
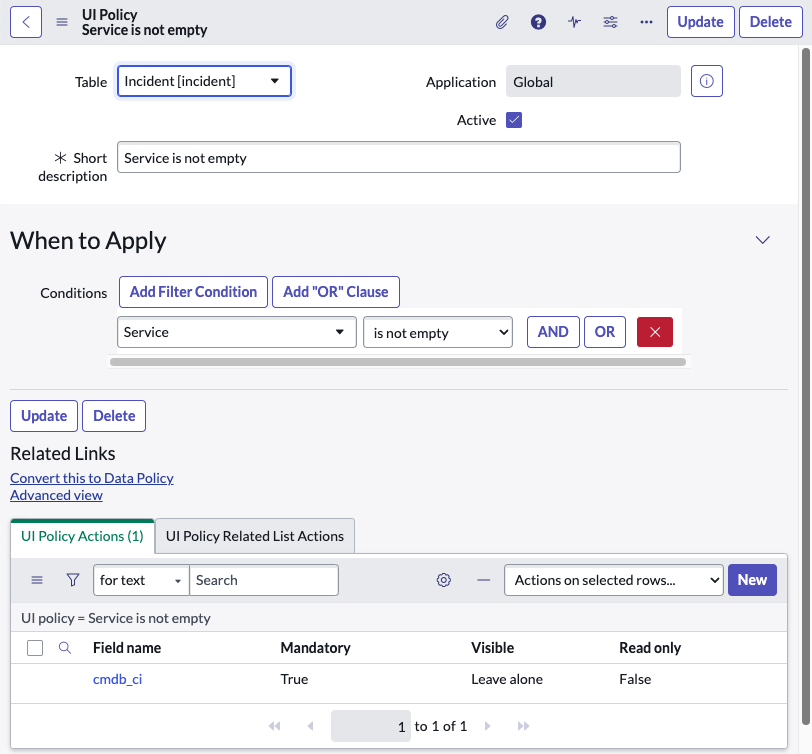
And we can see that this works!
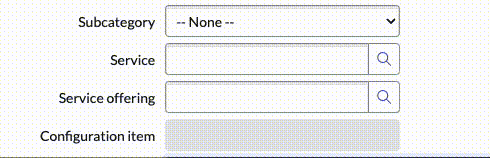
There’s one element missing with this… the Configuration Item field would not be cleared without a little extra effort. An admin or developer might initially resort to writing client-side JavaScript to make that happen. A useful feature to make this easier (and dive deeper into that no code/low code life style) is by reversing the condition and actions.
Start by changing the condition on the UI Policy from “Service > is not empty” to “Service > is empty” (the opposite condition of the initial version).

Next, update the UI Policy Action on the Configuration Item field so that everything is the opposite and the ‘Clear the field value’ checkbox is marked/true.
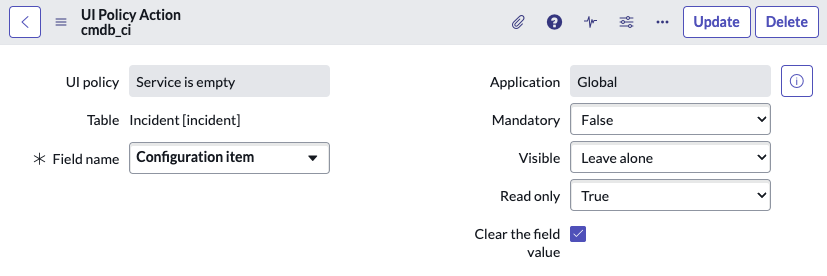
And we can see that it works!
The secret sauce here is the ‘Clear the field value’ field. Whenever the UI Policy’s condition is not met, the selected field’s value will be cleared. The big caveat is that in order to use this checkbox, the UI Policy needs to be built in the opposite way than most people initially think. (At least that was the case for me.)
At this point, I exclusively create UI Policies in the “opposite” or “negative case” way unless the conditions become too complex for me to grok them. This method works in the service catalog, too, which is where I end up using it the most. I would guess that 90% of the UI Policies I create can be written this way and it makes it much easier to build and maintain.